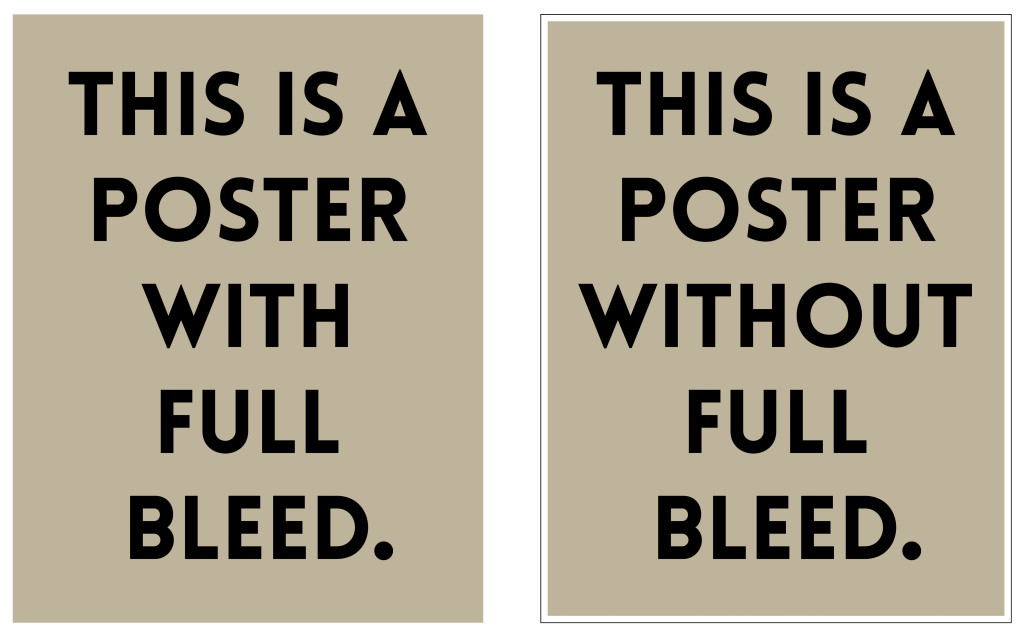
Are you trying to create a design that covers the entire page with no white border? This technique is called a “full bleed”. The following information will help you set up a file that bleeds properly. If you send in print-ready artwork, we don’t need to edit your files…your costs stay down, and we can print quickly to meet your deadlines!
Unless a file is set up to bleed, the finished piece will have a white border. Both offset and digital printing presses need to grip the edge of the paper to pull it through the press. You might hear the term “gripper margin” to refer to the edges of the paper. The press can’t print on the part of the paper that it’s gripping. To achieve bleed, we use a larger paper size, giving the press something to hold on to. After printing, we trim off this border and a sliver of the printed color, creating a clean bleed and the correct finished size.
What to do
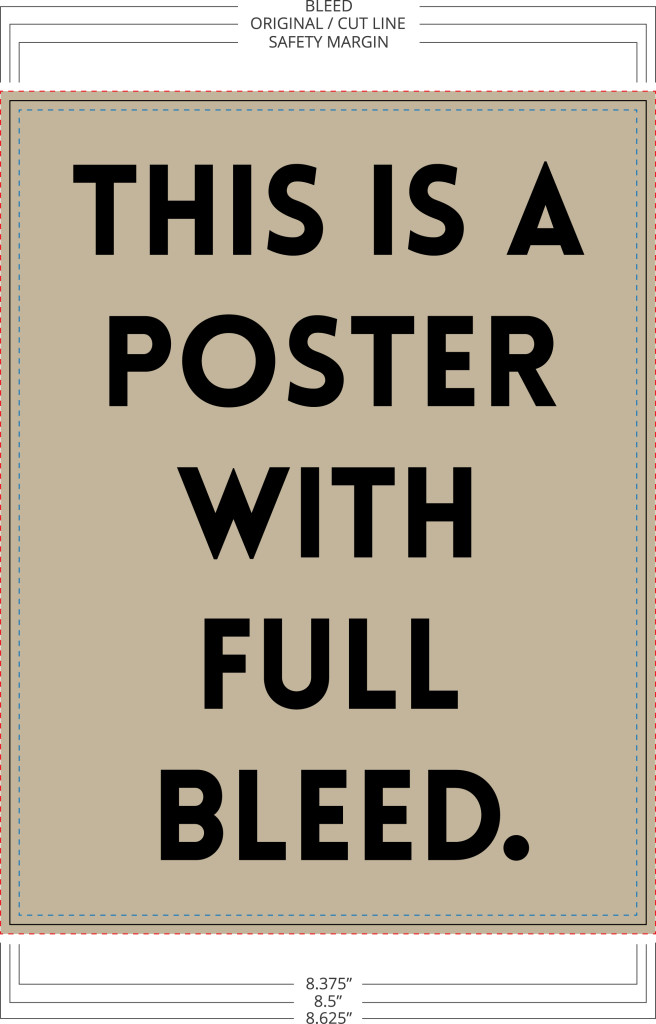
Let’s say you were designing an 8.5” x 11” poster and you wanted a photograph to serve as the background, covering the entire image (full bleed). As you are setting up your document you should create bleed marks that extended 1/8” (0.125”) outside all edges so that the size of the document including bleed marks is now 8 3/4” x 11 1/4”. Most programs will allow you to do this while setting up your document, but you can also do it manually with construction marks if necessary. Now that you have a blank document with bleed marks, you can begin designing. Imagine that the bleed marks you’ve just created are the new borders of your document. Any image that you would like to fill the entire piece of paper should be placed so that it extends past the original dimensions to all the bleed marks. Remember, we will trim the finished piece to the correct size.
What not to do
Please do not take your final design and simply scale it larger to fit a document with bleed marks. Although it may work for some designs, simply scaling the design will also scale all the text and content. Font size will change and picture quality will diminish. The end result will be a design that appears to be zoomed in. The correct way to design for full bleed is to understand how it works and design with that intention from the start. Only the content that you want displayed edge to edge on the final product should be sized so that it fills to the bleed marks.
Safety Margins
Next, you need to account for safety margins. Safety margins are the exact opposite of bleed marks. They are a margin set 1/8” inside the original dimension (bleed is set 1/8” outside) where no critical text, image, or content should be placed. Because of slight mechanical tolerances, your document might be trimmed anywhere in the margin area. Do not place any critical information such as page numbers or headers and footers inside this margin.
Overview
If you follow these recommendations for creating bleed, your finished product will look like the design you envisioned. Taking the time to understand and create bleed is worth the effort because your finished piece will have a more professional, eye-catching look.
In short:
Bleed – extend borders 1/8” outside original dimensions
Safety Margins – no critical content within an 1/8” (.125″) of original dimensions
We are happy to work files created by you or your outside designer. If you have any questions along the way, please don’t hesitate to contact us! Our goal is to educate our customers and create lasting relationships.


