 If you’re ready to employ a little creative marketing or artistic flair at your business, school, church, or home, look no further than floor decals to beautify your space and command attention. Floor graphics can be used for a wide variety of applications and are durable, long-lasting, and removable — making them an economical choice with a big return for your investment. Here’s what you need to know as you consider why, where, and how you want to use them.
Types of Floor Decals
Decals are essentially giant removable stickers that are durable enough to withstand regular foot traffic. They are made of vinyl or aluminum and consist of three layers: the base layer on which your design is printed, an adhesive layer to make it stick, and a non-slip laminate coating that protects your design from scratches, scuffs, and fading. Floor decals come in indoor and outdoor applications, are printed in full color, and can be cut into any shape (regular or irregular) that you desire.
Indoor
Vinyl floor graphics are best suited for hard, non-porous surfaces, such as tile, hardwood, laminate, and indoor concrete. If you want to install your decals on carpet, a different type of vinyl is used that is made especially for carpeting. Not all carpets are good candidates for decals, however. They must have a very tight weave and a short nap — commercial or automobile carpeting, for example — so they are generally not suitable for residential applications. Both floor and carpet graphics have a non-slip, non-skid surface that is safe to walk on and holds up well for up to 2-3 years on floors and 3-6 months on carpeting.
Outdoor
Outdoor floor decals are made with an aluminum foil base and are best used on concrete sidewalks and asphalt. The non-slip protective layer is also waterproof, making it durable enough to handle various weather conditions in addition to regular traffic for up to 4-5 years.
Uses for Floor Decals
You can use custom-designed floor decals to provide instruction or direction, advertise, attract attention, or even just add beauty and design to a bland or unattractive floor. Whether utilitarian or creative (or both!), there are endless possibilities for their use. Here are few ideas to get you started:
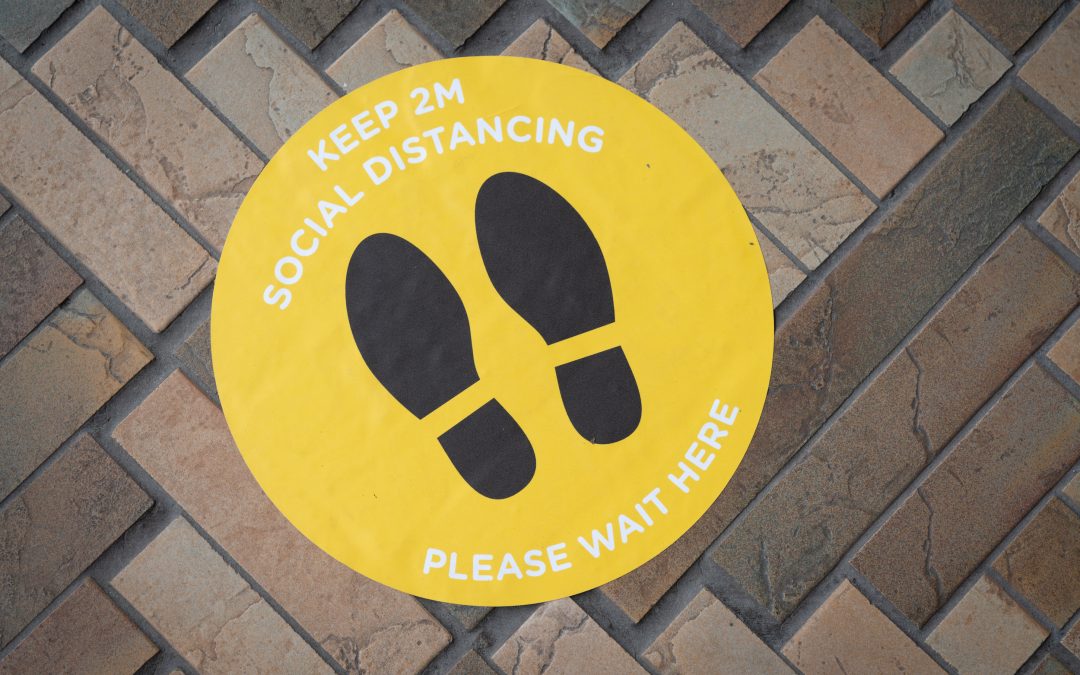
- Social distancing guides
- Traffic pattern guides
- Sale advertisements
- Designated “selfie spots” (social media advertising)
- Wedding and event photos, text, or logos
- Decorative, non-slip designs for bathroom floor tile
- Logo designs for churches, schools, gyms, or garage floors
- 3D art or advertising
How to Design Floor Decals
No matter how basic or creative you want your floor graphics to be, good design is important. For informational graphics, choose a font that is easy to read. Not only is the typeface important, but also the size and color of your text and background. There are some color combinations that are difficult for people with color-blindness to read, for instance. It’s also important that your design is the correct size and resolution, so your text and graphics are crisp and clear.
You can design your own floor decals with a graphics program and upload them to your printer, use your printer’s templates or designs and customize them, or hire a graphic designer to create something for you. Many printers have designers on staff who can work with you to design exactly what you need. Whatever you choose, your design will be printed in full color on high-quality vinyl or aluminum and cut into whatever shape and size you want.
How To Apply and Remove Floor Decals
Whether indoors or out, the most important rule to follow in preparation is to make sure your surface is clean, dry, and smooth. Dust, debris, moisture, and cracks all compromise the adhesion of your floor graphics, shortening their lifespan and weakening their durability. Equally important is to use the correct material for your application — if you are unsure, your printing company can advise you on what to use.
To Apply:
- Peel off adhesive backing.
- Apply carefully from the center outward, using a squeegee to flatten and push any bubbles out the edges.
- Allow your floor decals to sit undisturbed for 8 hours (more for very large graphics) to ensure proper adhesion.
To Remove:
- Peel the graphic back slowly at a 90-degree angle. It should come off cleanly, but if it does not, you can use a heat gun and a thin, plastic scraper to assist in the removal.
- Use your scraper to gently remove any sticker residue that remains, followed by citrus- or alcohol-based cleaner to thoroughly clean the floor underneath. Rinse and dry the area to ensure the floor is neither sticky nor slippery once you’re done.
Affordable, durable, and easy to install on nearly any surface, floor decals ensure that your ads, information, and designs will get noticed, particularly because people tend to look down when they’re walking or on their phones. Minuteman Press of New England can help you from start to finish on any design you can dream up — contact them today for a quote.